


Quickly test tower tweaks directly in this build view. Changes are not saved.
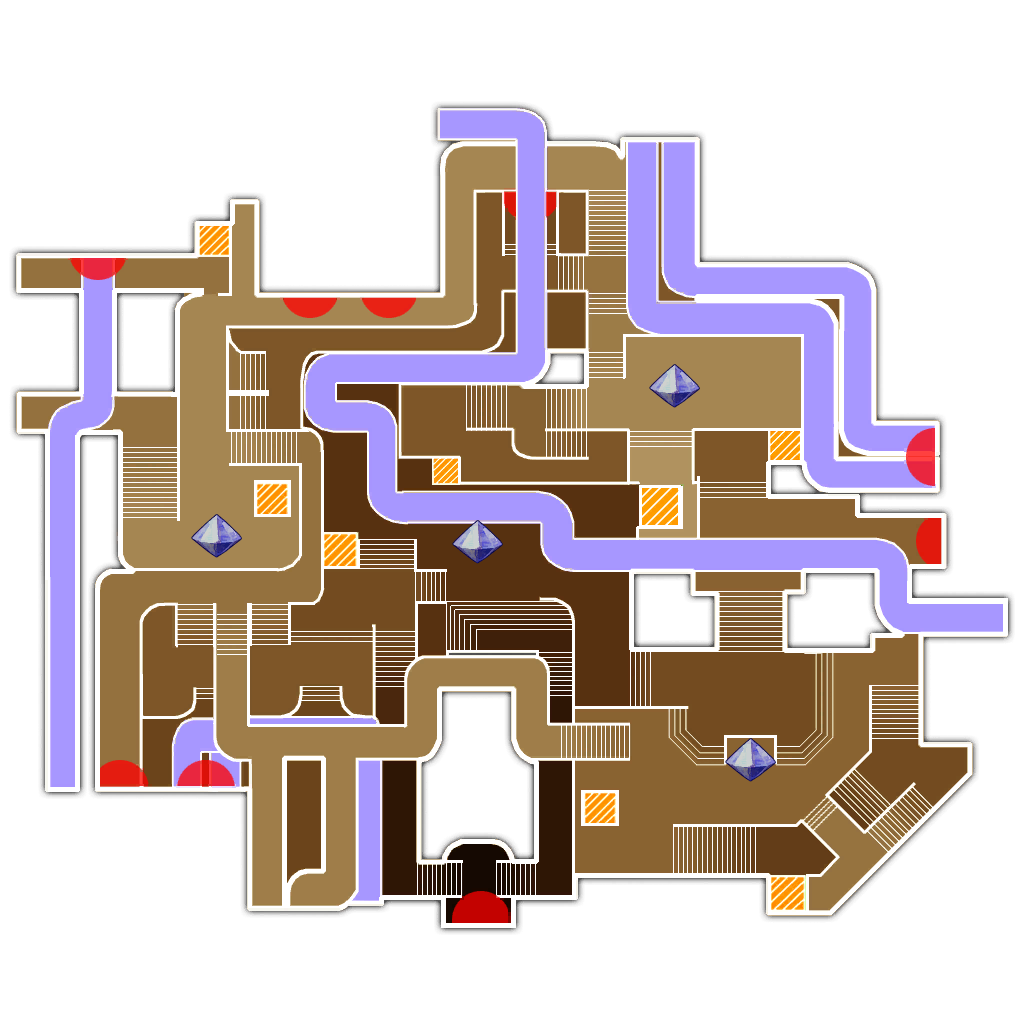
Click on a numbered hint marker on the map to zoom and highlight nearby towers. Double click on map to reset zoom.
No hint selected.
Highlight placed towers (Chrome limitation applies)


Build Status: Public
Difficulty: Any
Game Mode: Campaign
Hardcore: No
Ruthless: No
AFK Able: No
Mana Used: 0
Mana to Upgrade: 0
More Builds from Sleepy
Toggle the summoner to see with and without minions.
I don't run this with minions. Minions are for your crystals are consistently getting hit (meaning you probably need more range on the builder monk and/or more stats on the apprentice). When I'm just doing other things, I just leave everything without any upgrades other than the 1 buff beam. I use a 5du buff beam rather than a 4du one because there is an extra du and also it's quicker to build a sloppy 5du buff beam than to measure out a lengthy 4du buff beam.
I just have a Monk guardian and a Huntress guardian on the LT stack with 2 of the AFK characters (1 if it's a summoner).
If you are struggling, you can upgrade the towers and auras. You could also have the other AFK characters each hold more guardians. For example if they aren't summoners, something like monk, huntress, and app guardians on the LT stack while the DST stacks have huntress + app/monk (monk if your range isn't long enough on the DSTs).
You'll be tower boosting through all the waves. Place your tower booster on the railing at hint 4 and just shoot down that lane (direction of tan arrow). The boost with mana generation should last you throughout the whole wave when you do this.
Auras take care of non-ogre mobs. If non-ogre mobs are reaching the crystal, then you need more stats on the auras and/or need to upgrade the auras. If aura seems a little low, it should be just a quick hop over and back while TB aura is ongoing (heals auras almost instantly).
We're building the towers on the conveyor belt. Angle of arrows are very intentional.
First build phase run around with aura monk and grab all the mana as you build. Fastest route from my experience is going clockwise around the map.
Hint 1:
- DST faces direct west
- DST faces southeast, but more east than south so that the DST does not hit mobs coming from the direct south spawn the south lane.
- DST faces northeast, but a smidgen more north than east.
During first wave, use a genie to generate mana to upgrade the buff beam and have mana for the next build phase. Mana will be easily generated by attacking the direct south spawn mobs coming up the lane. You should have someone that can clear those mobs. My tower booster and upgrader can clear them. If you don't have someone that can clear them, then that wave will go too long. Notice that there is no electric aura on the middle crystal stack. If you want to make this even shorter like some tryhard, use your app with die/genie to build the Hint 2 and Hint 3 towers during the wave.
Hint 2 (Second build phase)
- DST faces northwest, but more west than north
- DST faces direct southeast, so that the DST does hit mobs coming from the direct south spawn the south lane.
- DST faces northeast, but a smidgen more north than east.
- DST faces southwest, but a lot more south than west. This DST should be able to hit ogres coming from the southwest angle and also cover the direct south spawn
Hint 3 (Second build phase)
- Just a normal 5 LT stack
Happy farming. :)