


Quickly test tower tweaks directly in this build view. Changes are not saved.
Click on a numbered hint marker on the map to zoom and highlight nearby towers. Double click on map to reset zoom.
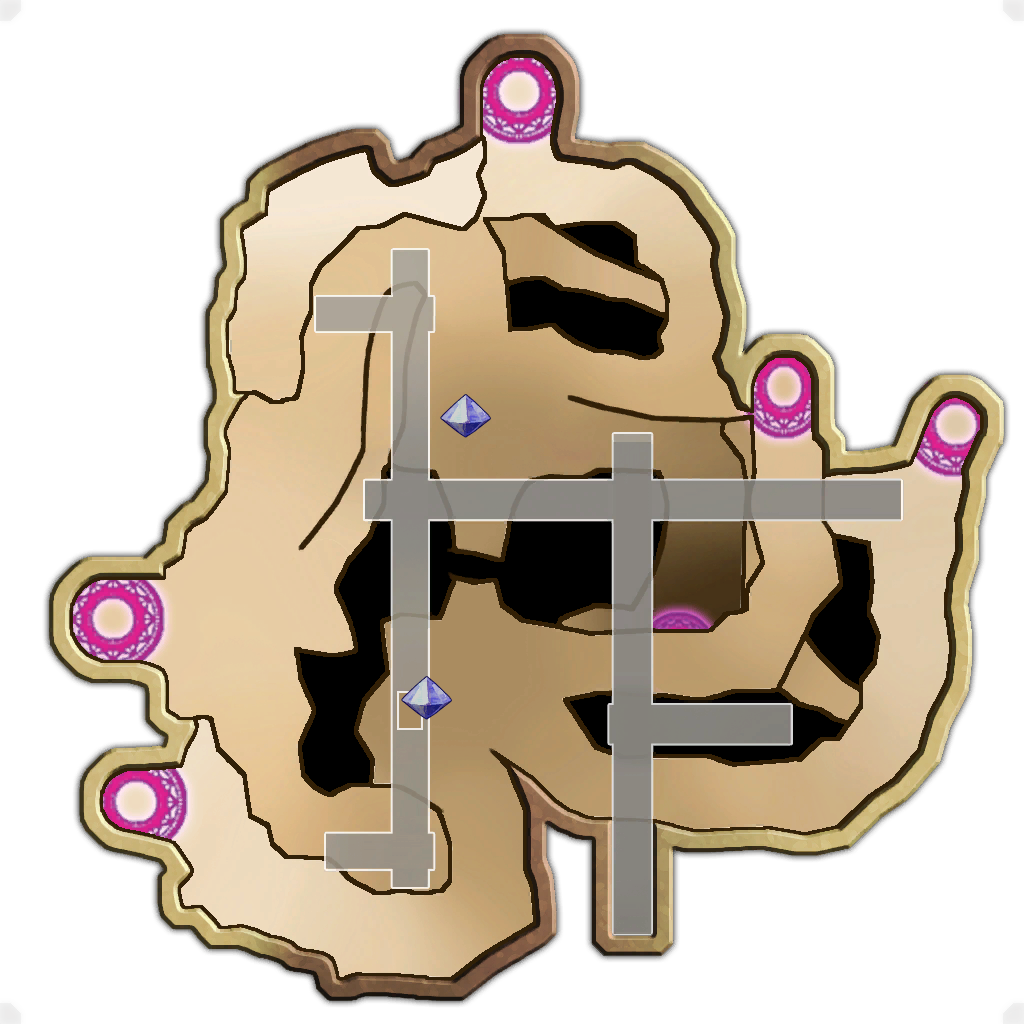
No hint selected.
Highlight placed towers (Chrome limitation applies)


Build Status: Public
Difficulty: Nightmare
Game Mode: Campaign
Hardcore: No
Ruthless: No
AFK Able: No
Mana Used: 0
Mana to Upgrade: 0
More Builds from Garzhod
Embermount Campaign DST Build | Updated 8/22/23
Supports 1 tower boost + 3 apprentices. Very stable build, should not need to be tboosting or guardian boosting the entire time to bring the pressure down - focus on upgrading. This map is all about enemy behavior and finding ways to gain advantage with aggro, check out the photos for boss wave and placements below, which should ensure you have ample time to tboost through any RNG phoenix events.
Notes
-IMAGES OF TOWERS + LOCATIONS FOR BOSS WAVE https://imgur.com/a/aKJultP
-Tag 2, 3, and 4 are where you place your apprentices for boss wave. Ground floor on the wood overhang supporting a chest. Guardian boosters will hit towers from here.
-Tag 5 is where your tower booster will be for boss wave, and the blue arrow indicates where to aim.
-Heal aura will cover apprentices but is intended to keep your tower booster alive if phoenix attempts to dive or fireball that character first
-Wave 1, build all towers except DSTs. Move gas trap onto S crystal. Wave 2, build remainder.
-Upgrade with apprentice until all 3 star, then tower boost is optional, I personally use guardian booster for slight afk. Boss wave, 3 apprentice and 1 monk tower boosting as directed on the blue arrow
View more of my builds here!
* 5 out of 5 runs completed succesfully ;)
27 December 2023
What are your tower stats cause I'm trying it out and I fail every time