


Quickly test tower tweaks directly in this build view. Changes are not saved.
Click on a numbered hint marker on the map to zoom and highlight nearby towers. Double click on map to reset zoom.
No hint selected.
Highlight placed towers (Chrome limitation applies)


| Name | HP | Damage | Range | Rate |
|---|---|---|---|---|
 Monk Monk | 4300 | - | 7700 | - |
 Hermit Hermit | - | - | 3300 | - |
 Warden Warden | - | 7900 | 4600 | 4600 |
Build Status: Public
Difficulty: Ruthless
Game Mode: Survival
Hardcore: No
Ruthless: Yes
Mix Mode: No
AFK Able: No
Mana Used: 0
Mana to Upgrade: 0
More Builds from Sleepy
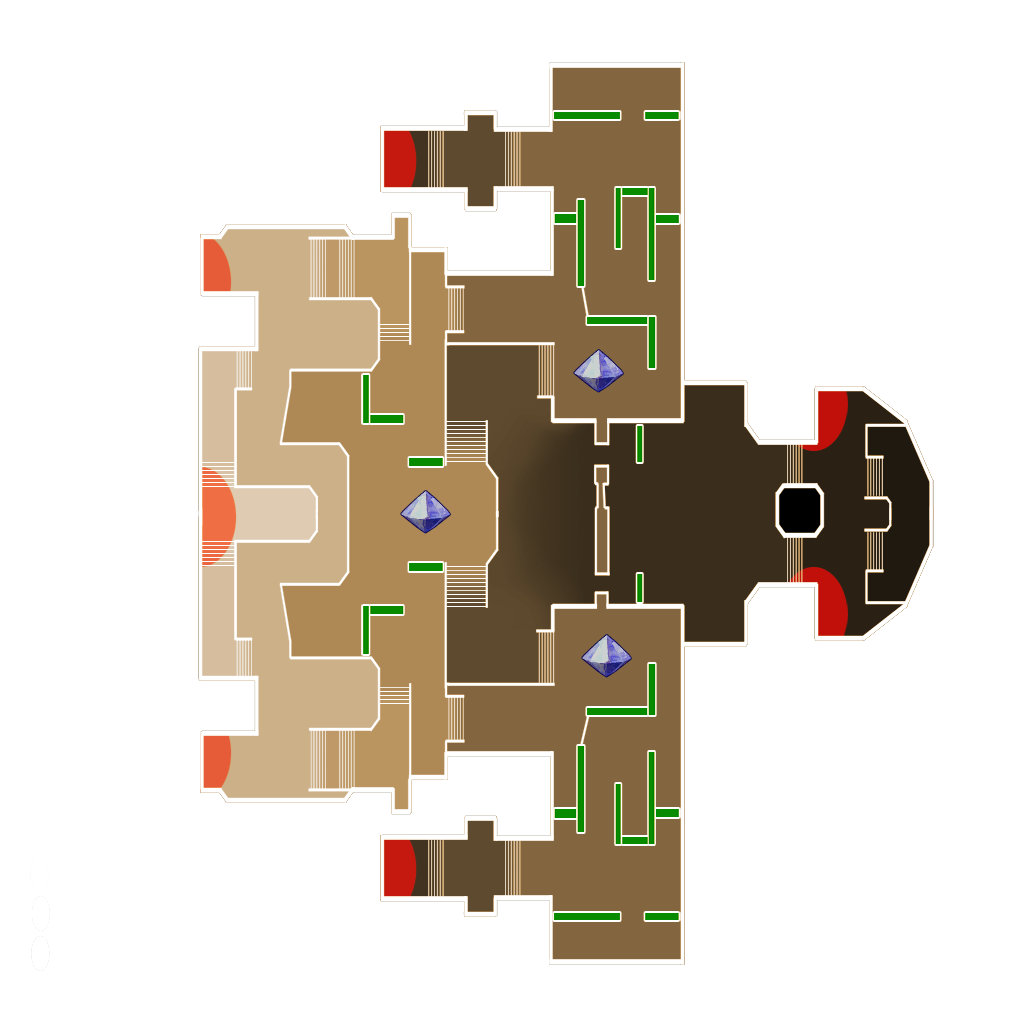
Hint 5's (east):
- 3 huntress/app guardian summoners here are on the ground and under the stacks. They are also staring into the wall to help remove any lag.
Hint 5 (west):
- This is the summoner you control. It stands on the northwest edge of the fountain structure. Put some DPS gear on it with a nice DPS pet and a monk guardian. The monk guardian will boost the west strength aura so that all the electric-immune mobs that come from the west spawns can immediately take damage from the Cloud Towers.
- The DPS pet just adds a little bit of damage to help speed things along a little tiny bit. At least that's what I tell myself. My summoner has Red equipped and outputs about 4.3m DPS on the single 1st floor tavern dummy.
- For some extra effort, you can pick up the three chests nearby on the west side of the map during the wave.
Extra Notes:
- An EV buff beam is not needed as the Huntress guardian's, App guardian's, and Nature Pylon's buffs are stronger than the buffs the beam would provide. In some cases like this where there are buffs of the same kind, the game will choose the strongest of the buffs and ignore the weaker one.
- The east Reflect Beam on the ground is built on the front edge of the benches.
- The Ensnare Aura is placed so that it protects all the crystals without interfering with any of the spawns nor reaching outside the influence of any Strength Auras when the Nature Pylon is fully upgraded.
- The Nature Pylon is placed so that it affects all structures, though it's okay if it misses the Reflect Beams. As long as the Nature Pylon shows that at least 22 structures are affected, then it's placed correctly.
- If you're having trouble with placing the towers and reflect beams so that the ogre balls don't hit your towers, or if your controlled summoner is dying, then modify this build to a safer and older build I used:
- Remove the east reflect beam on the ground and remove 2 Wisp Dens. Add an EV buff beam on the stacks. Add a golem on the middle stack. Add an Angry Blossom pointed directly east in the middle stack.
- You can start the first wave with your upper before upping any towers. Just make sure to get the Nature Pylon fully upgraded ASAP. You will probably need to hit the minus or plus key to quickly sort to the Nature Pylon for upgrade. For me, it's always hitting the minus key once.
- If the Wisp Dens are lagging your computer, then remove 1 or 2 Wisp Dens and replace them with Cloud Towers and/or Angry Blossoms on the middle stack pointed directly east.
- If you have too many Wisp Dens, the game lags so the in-game time displayed is actually shorter than the actual real world time. Basically too many Wisp Dens makes the run go longer than the game actually records. I did some experiments with single and split screen on some overly Wisp Den heavy builds to see how lag affected the actual time waves took versus what the game said instead. Lag always made the actual time go longer. The more lag, the longer the time. Split screen with the characters staring at the Wisp Dens had a real life time of around 7 minutes for a wave when the game recorded under 3 minutes instead. Meanwhile a build without Wisp Dens with split screen and staring at the towers had the real life time match the game's recorded time.
I ran the old build (not optimized for 4 summoners) with 1, 2, 3, and 4 summoners. Oddly, the less summoners, the slower the time. The fastest time on the old build with 4 summoners had combat starting at about 2:30 per wave and breaking 3:00 on wave 35 with my stats. This build is optimized for 4 summoners by replacing the buff beam and Angry Blossom with a Wisp Den instead. It ran a few seconds faster on each wave, since the Wisp Dens help clear out the late ogres faster.
Displayed stats for Warden, Monk, and Hermit are just what I ran with, so I don't know how this build performs on lower and higher stats.