


Quickly test tower tweaks directly in this build view. Changes are not saved.
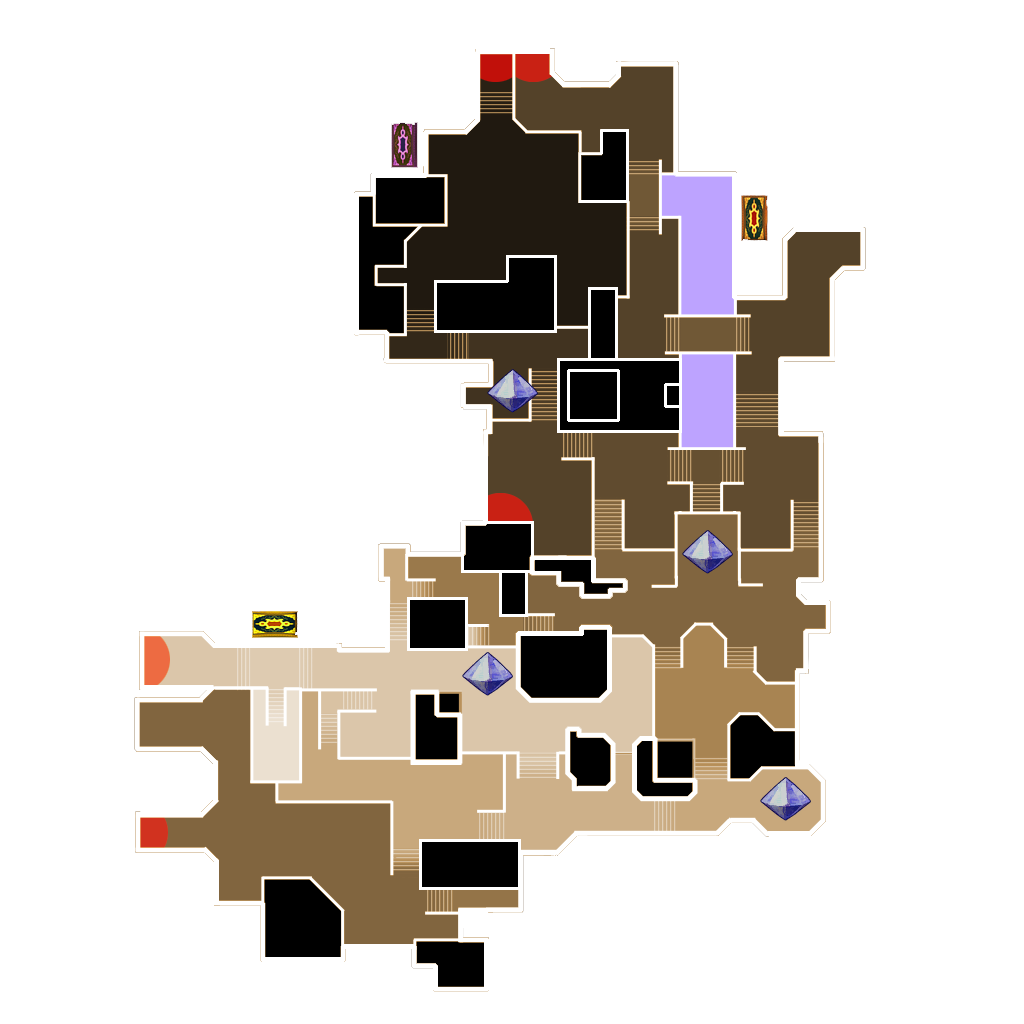
Click on a numbered hint marker on the map to zoom and highlight nearby towers. Double click on map to reset zoom.
No hint selected.
Highlight placed towers (Chrome limitation applies)


| Name | HP | Damage | Range | Rate |
|---|---|---|---|---|
 Huntress Huntress | 2500 | 8400 | 4500 | 4000 |
 Guardian Guardian | 8900 | - | 4000 | 4100 |
 Warden Warden | 3400 | 8800 | 4400 | 4200 |
 Monk - Damage Range Monk - Damage Range | 4400 | 5200 | 7700 | 3600 |
 Hermit Hermit | 3900 | 8500 | 4500 | 3000 |
Build Status: Public
Difficulty: Ruthless
Game Mode: Pure Strategy
AFK Able: Yes
Mana Used: 0
Mana to Upgrade: 0
More Builds from Sleepy
High stats are probably needed. I posted the stats I used. Screenshots of the build are at the end of this post.
Under 30 minutes combat time.
Under 5 minutes initial build time and setting up characters going slow-ish.
Characters:
- Adept Upper. Upgrade Hint 3, Hint 1, and then Hint 2 in that order.
- Switch to Summoner with Huntress/Monk guard pets at Hint 3.
- TB equipped with Madness Boulder Thrower weapon (Chicken Baller won't cut it here) is against the wall east/behind Hint 3's tower stack. Black arrow shows the direction to aim, which your crosshairs should be on (or around depending on FOV settings) the donkey's head for boost to last the entire wave.
- Summoner with Huntress/Huntress guard pets at Hint 1.
- Summoner with Huntress/App guard pets at Hint 2.
For the builders with towers that can potentially not share space, build with them in this order: Guardian, Warden, and then Hermit.
Hint 2 and 3's stacks are built on the "railing" (except for Hint 2's gas trap which is on the floor).
Electric and Strength Drain auras are built slightly closer to Hint 3's stack than the Ensnare aura is.
Blue arrows are Cloud Tower directions.
Green arrow is the Sludge Tower direction.
To "AFK", make sure to heal the auras between waves when needed and just start the tower boost every round on a split before switching back to the main so that boost continues without input. You can then walk away from the computer or alt-tab.
Screenshots for build/placements:
TB crosshairs on donkey's head.

Hint 1

Hint 2

Hint 3
