


Quickly test tower tweaks directly in this build view. Changes are not saved.
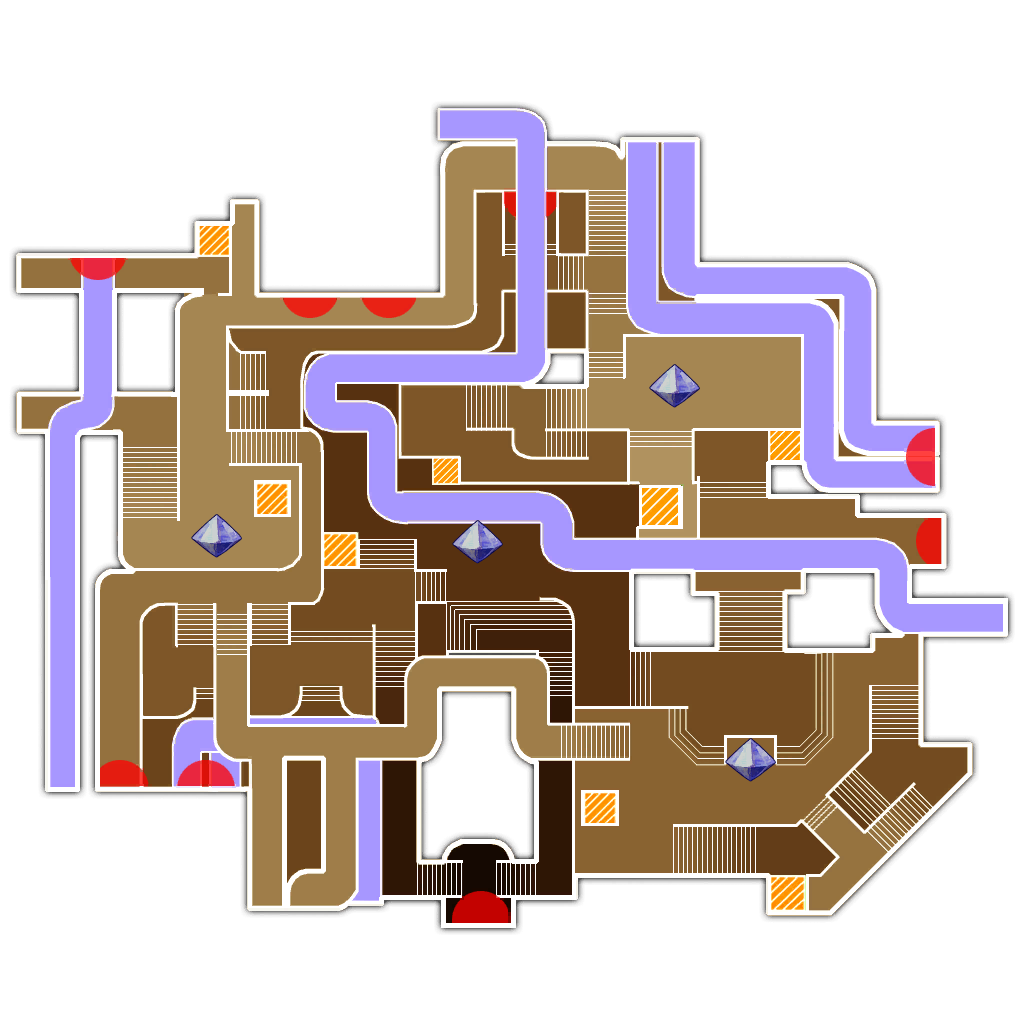
Click on a numbered hint marker on the map to zoom and highlight nearby towers. Double click on map to reset zoom.
No hint selected.
Highlight placed towers (Chrome limitation applies)


Build Status: Public
Difficulty: Any
Game Mode: Campaign
Hardcore: No
Ruthless: No
AFK Able: No
Mana Used: 0
Mana to Upgrade: 0
More Builds from Chiraux
Modification of this build which is a modification of this build by Shinjuku.
GENERAL NOTES: (tl;dr in italics)
- Boost monk is necessary. I suggest putting them near hint one on a lightning tower and shooting down towards the mobs coming from south core. (You can stand wherever as long as you get a relatively steady stream of mana.)
- Summon order:
- Build 1: summon auras and beams.
- Combat 1: collect mana and try to save a lot so you can finish summoning in wave 2. (With multiple people saving mana, it's completely possible to finish on wave 2.)
- Build 2 and beyond: summon whenever you have the mana to starting in this build phase, but best order is lightning towers, deadly striker towers, archers, spiders, mages. If you can't finish archers by wave 2, make sure to guard the apprentice towers and try to keep them from getting hit.
- If you can stack, use the builds mentioned in the beginning. (first is for lower stat, maxes DU)
FIRST RUN NOTES: (tl;dr in italics)
- This build is based around getting the ogres aggroing the lightning towers and ignoring the crystals. This means you should pay attention to spacing of towers by crystals.
- In my experience, the orientation of the auras around the crystals is important to how you survive the first wave. I suggest following the listed orientation.
- I've found that for most people, this build works fine if you just upgrade beams.
Hint 1: 6 DU buff beam.
Hint 2: 5 DU buff beam. (only to fill DU. 4 DU works too)
Hint 3: You'll have to split these towers over the beam. Personally, I split the 4 lightning towers with each other and then add the deadly striker towers, as the size of the two towers is slightly different, and I find it a lot easier to split the difference between two of the same tower than between two different sizes.
Hint 4: You must remember to repair this aura stack. It depends on your aura hp, so just figure out what that is for you.